The Tygron Community Forum will be discontinued on March 6th 2026, matching the release of the 2026 version of the Tygron Platform.
Click on your picture in the top right corner, go to Preferences and select your notification preferences.
Please keep in mind:
1. To only comment on the topic where the discussion is about. Do you have a new question or topic? Please start a new discussion.
2. Be kind to other users!
Difference water on surface due to DEM

Hi there,
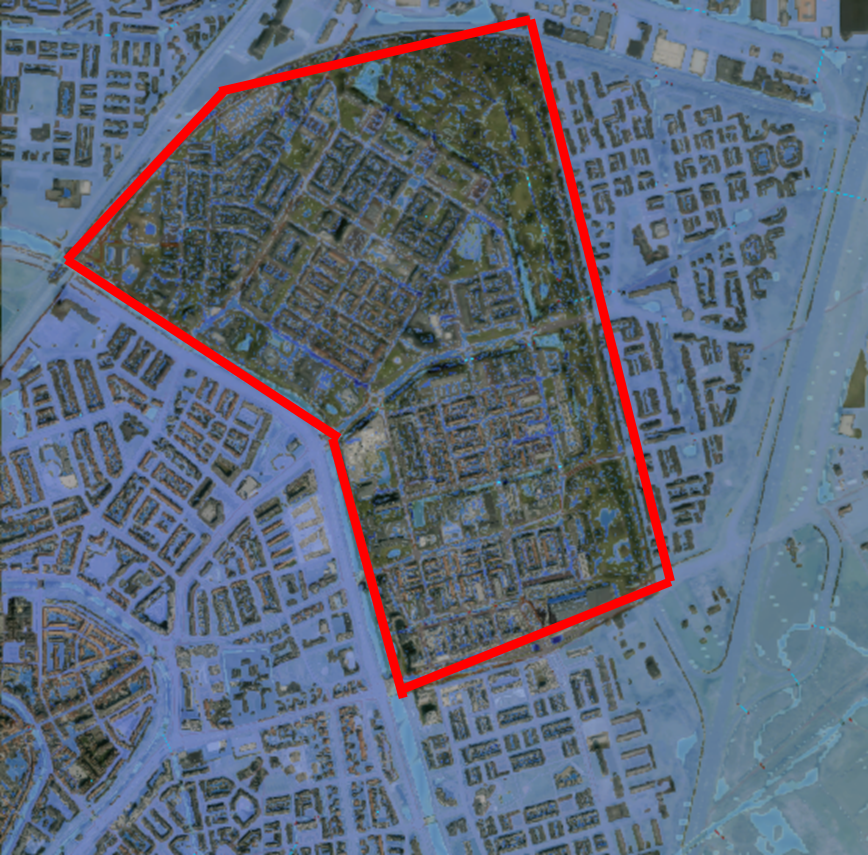
I am working on a case in Amersfoort and in the model I uploaded an own elevation geotiff. This elevation tiff only has data in the project area (shown in red in fig.). There is clearly a difference visible between the inner and outer project area. How is this possible? Is the default elevation model (AHN) used for the outer part? There is almost no difference between the default and uploaded elevation model in terms of height. So how is it possible that there is a difference looking at water on the surface due to rain?
Thanks in advance for your response,
Kind regards,
Anne
Best Answer
-
Hi Anne,
I believe the most robust solution would be the following:
- Add a DTM Overlay. You can find it under the topology group of Overlays. This will provide the default height map as a calculable grid.
- Add a GeoTiff Overlay with your own elevation data. You already have one, added and currently serving as prequel to the Water Overlay
- Add a combo Overlay. You can find it in the geo calculation group of Overlays
- Set the name of the Combo Overlay to "Combined heights"
- Set Input A of the Combo Overlay to your GeoTIFF Overlay
- Set input B of the Combo Overlay to the DTM Overlay.
- Set the formula of the Combo Overlay to: IF(EQ(A,NO_DATA),B,A)
- (This means if A has no data, then use B. Otherwise use A. This means that the combo overlay will have your data where available, and otherwise the default DTM data)
- In the Water Overlay's configuration wizard, in the step regarding the elevation model, select the "Combined Heights" overlay as its elevation prequel.
This will mean that you get your data where possible, and the default data where necessary, and will also allow you to add, remove, and change what your modifications would be without making those changes permanently to the base data (which would be undesirable as those kinds of changes are very hard to undo).

Answers
Hi Anne,
without more details its difficult to give an exact answer, however it is obviously likely that your height adjustment has caused less water to be retained in the relevant area. At a glance, this could mean that either the indicated area is now a bit higher than/inclined towards the surrounding areas, or perhaps that the surrounding area is now significantly lower (which could be the result of loading in a GeoTIFF which doesnt use "no data" values outside of the indicated extent but some other placeholder value which equates to a valid datum height). Depending on the result type, it could also mean the water can simply more easily find its way to storage locations.
Can your provide more information about the following aspects of your Project:
Regards,
Rudolf
Hi Rudolf,
The elevation model used before is the default elevation model, so I think AHN3. I did upload the elevation model as part of the rainfall wizard. Is there a difference between uploading a new elevation model under Terrain --> Select elevation Geo tiff or by adding it in the rainfall overlay in the wizard under step Elevation model? And what will be used when I upload it both under terrains and in the rainfall wizard?
On the outside of the marker area I did not specify values. The raster has only values inside the marked area.
The result type shown is 'Surface Last Value'. Before the changed elevation, there was no clear division visible, it all looked liked inside the marked area.
Hi Anne,
A Project has an elevation model which dictates the heights for all location in the Project. By default, the Water Overlay will use the elevation model present in the Project. However, it is also possible use an alternative source for elevation data, instead of the default elevation model. You can then select the data/results of a different Grid Overlay as height input instead. We call such a reference a "prequel". You can find more information about this functionality on the page regarding the terrain elevation prequel.
https://previewsupport.tygron.com/wiki/Terrain_elevation_prequel_(Water_Overlay)
However, when using this option, the data in the prequel must fully cover all relevant locations. Every location in the Project must have an elevation associated with it. If a Grid Overlay has NO-DATA in any location, that would lead to undefined behavior and unpredictable results. Therefor, for each prequel there is some specific behavior when NO-DATA values are present. In the case of the terrain elevation prequel, the value is clamped, leading to a terrain height of -10000.
This matches with the initial interpretation that it seems like the central area is significantly higher than the surroundings: the surroundings are computed to be significantly lower.
To verify this, add the "Surface Elevation" result type to the Water Overlay as well. It will display the height of the Project as interpreted by the Water Overlay. In the case of using a terrain elevation prequel, it will show exactly how your addition of elevation data has affected this aspect of the calculation.
Regards,
Rudolf
Hi Rudolf,
Thanks for the explanation. That makes is more clear!
I have a DEM (saved a Geotiff) with a higher resolution which we want to use. Would you recommend to implement this in the water overlay in the Configuration Wizard (as a prequel(?)) or under Terrain -> Select Elevation geotiff? Because they give different results. I would say under terrain, because then you do not have -1000 values in the elevation, right?
Thanks for your help!